Search This Blog

Thursday 18 December 2014

Christmas Crackers for the teachers


Using  a new Tonic Christmas cracker die , I decided to make a small token gift for my sons teachers at school. it started by making 2 which soon turned into 11.

I decided to use a father Christmas die for the men's and a choir girl die for the ladies.

Each cracker was cut from white American crafts textured card. Using a decorative rectangle die also from Tonic I cut detailed rectangles from both gold and silver mirror card stock.

The choir girls were cut and layered up according and the stamps provided were used to create the faces. 

These were fixed with strong double sided tape. The crackers were filled with some sweet treats and sealed using organza ribbon. 


The men's crackers were created in the same way but using a Santa Cottage Cutz die and an added section to resemble a chimney top. These were fixed to a decorative edge rectangle cut form gold mirror card. These were filled and sealed using red Organza ribbon.


Happy Birthday wishes to my mum

A special card for my mum who celebrates being another year older - Happy Birthday Mum.

Using an image from the Joanna sheen House Mouse decoupage designs , I found the prefect image as my mum used to be personal secretary many years ago.

I printed out the decoupage sheets and layered up the cut sections using 1mm foam pads. The main decoupage section was matted onto cream and black card stock.  The backing paper was matted onto black card. Black and cream ribbon was used together secured by a diamante buckle and fixed across the backing paper section. The was matted onto plain cream card, matted on black card and fixed to the base card.

Using some alphabet stamps that I've had for years and never used, I stamped out the phrase happy birthday mum onto shrink plastic, I stamped 8 without a letter showing. All were shrunk down and fixed to the bottom of the card. the Happy line using 1mm foam pads, birthday line using 2mm foam pads and the mum line using 3mm foam pads,  trying to reflect the old typewriters keys.


A personalised Cats Christmas card


A request this month from one of my husbands colleagues, wanting a personalised Christmas card.

I was sent four photographs, and the request was to have these on the card wearing Santa hats.

I decided to use the Serif software, which I am still learning to use.

I firstly cropped and then imported the photographs into the software and layed them on a blank background sheet. I wanted to put the photographs in frames and found the ideal Polaroid photo frames in a set of four. I worked initially with just the frames and the photos and got them all aligned before adding the background papers and the baubles down the side of the card,

I found the Happy Christmas phrase and added this to the bottom of the card changing it to a white colour.

Adding Santa hats was slight more difficult as I didn't have any Christmas hats in my digital kits. I tried to import a hat but to no success. I then looked at the shapes section in the software and decided to attempt to create hats using oval shapes for the red section and then a wavy line for the white section, this seemed to work quite well as an alternative..

I was pleased with the card, as was the person requesting the card. Lets hope the recipient likes it too with presumably her favourite cats on.


Birthday Wishes to the Chef


Belated post and belated birthday wishes to Danny. A character card request for Danny the chef to celebrate his birthday.

Using Cricut Everyday dolls cartridge I cut the main figure and clothes for the main chef character.

The apron was cut  twice from blue card stock to create the additional pocket section. The white stripes were created using a white fine marker down the front of the apron.

Knifes and saucepans were cut from silver mirror card and brown card stock and layered up accordingly.

A personalised message was printed and matted onto blue card stock and fixed to the base backing card. Two photo corners were cut and attached to the top of the card.

The character was fixed in the middle of the card and the utensils fixed fixed randomly up the sides of the card.


Sunday 14 December 2014

Birthday Card for my Lovely Grumpy Husband

I thought this was a good idea for my husband when I made it but as his birthday draws closer I'm wondering how it will be received.
 
After somewhat of a challenge to obtain the Cricut Happily Ever After Cartridge, which has been discontinued By Provocraft, my work colleague successfully sourced a copy for me and the bonus was although it was second hand it hadn't been syncronised to the Cricut Gypsy device.
 
I used the main Grumpy image from the cartridge and using my Cricut Gypsy device welded the shadow letter B, from the Cricut Mickey Font cartridge in the position where the axe was on the Grumpy image.
 
I spelt out the words 'Have a Grumpy Birthday' using Mickey font cartridge on the shadow option and welded some of the letters together and cut out from black card stock.  I cut the smaller letters in normal size font in red card to fix over the shadow background. 
 
I cut out the layered sections of Grumpy and when cut removed the axe section on the base image which was welded to the B.
 
The candles were cut from matching card stock using a Sizzix thinlets die.
 
The white background was embossed using a Happy birthday embossing folder and matted onto black card and fixed to the base card.
 
Grumpy. words and candles were then fixed accordingly.
 
Lets hope my husband has a great birthday and takes the card as its intended otherwise he will be very grumpy on his birthday.
 

Tuesday 2 December 2014

A Card for an Old Bean

Time to make a birthday card for a special friend.

Using an image from House Mouse CD, I printed the decoupage image sheet. The sections were cut out and layered up using 1mm 3d foam pads. The backing paper was taken from House CD Project Book.

The main image was matted onto two brown pieces of card (light and dark brown) , the backing paper was also matted onto the same card matts. The backing section was fixed using double sided tape to an a5 sized card.

The main image was fixed using 1mm 3d foam pads.

A Happy Birthday message was stamped using Phill Martin's scribbled sentiment stamps and matted onto brown card and fixed to the top corner of the card.

To decorate, real coffee beans were used. These were first glazed using Glossy Accents. When dry they were fixed to the card using silicon glue.

Lets hope Nicky has a lovely birthday.

Tuesday 11 November 2014

A card for My Birthday Buddy - Deb

Well Armistice Day is approaching so time to make my birthday buddy and my youngest son's Godmother,  Debbie a birthday card.

Deb is fanatically about stationary so I decided to use a Housemouse decoupage design and incorporate a chalkboard peg on the card, that way she could use the peg afterwards.

I printed the decoupage pages and the matching background paper  from the Joanna Sheen House mouse triple CD.

I cut both the small and large decoupage sections out and layered them up using 1mm 3d foam pads. I picked a chalkboard peg that came free with a craft magazine and chalked a smilie face on the board. I tied two pieces of chalk together using some brown twine.

I attached a magnetic strip to the back of the peg and cut another section of magnet to attach to the base card.

I cut a black piece of card to fit the base card and then cut the backing paper slightly smaller, before fixing I positioned the toppers and chalk so I knew where to attach the other magnet section in between the backing paper and the black card so it was hidden, but the peg would attach too.

The toppers were fixed using double sided tape and the chalk sticks were attached gluing one chalk only with silicon glue.

 
As the depth of the card was quite high due to the peg , I decided to have a go at creating a box, using the Hougie board and the instructions to make a box and lid. It was surprising very simple and I will definitely be making more in the future. To decorate the box I printed another sheet of backing paper and attached to the top and the sides of the lid section matting onto black card first. To finish I wrapped a black ribbon around  the box and tied in a bow to finish. 


Thursday 6 November 2014

A Compendium of a card for Petes 50th

A card commission from a friend who wanted a compendium card for a special mates birthday. The card request was - I would like a card with Leeds FC on, Elvis and Green Bay Packers American footballers. My initial thought was you want all that on one card - really ! After some thought I realised that  it may be possible and may not look as horrible as originally thought.

Having a Cricut machine and the Paperdolls and Everyday paper dolls cartridges that are my most used cartridges, I realised there was an American footballer on there that I thought I would never use.

Firstly I got an image of the kit that the Green Bay Packers wear to work from and using my Cricut Gypsy device I selected the basic outfit items for the footballer and then added detail for both the helmet and the shirt. I wanted my particular character to wear a face guard so cut this out from black card also. The detailed sections were all glued onto the shirt and helmet and the main character was made up , the guard protector was slightly curved over a pencil to add definition. The face was stamped using Sizzix doll faces and the  eyes were stamped again onto white card and cut and glued into place. A ball was cut twice and layered up. I embossed a square of white American craft card using Swiss dots embossing folder and matted this onto yellow card measuring just slightly smaller than a 4" x 4" square. 

The next section to create was the Leeds FC section. Again using my Cricut Gyspy machine and my soccer cartridge, I selected the shirt section and hid the cut detail, hence leaving me with blank shirt template. I created a copy of the shirt and enlarged it slightly to create a background section.

Using Mickey's Font cartridge I added the name Pete and shirt number 50 on the smaller image. I created a similar template using the shorts from the same cartridge. The images were cut out from both blue and white card and the blue letters were fixed in to the white sections. Two boots where cut from the cartridge in white card for the background section and black for the detailed layer.

I embossed a square of white American craft card using my football embossing folder  and matted this onto black card measuring just slightly smaller than a 4" x 4" square.

I cut a number of  footballs, using my Quickutz football die, these were fixed to the embossed section, surrounding the main shirt, shorts and boot toppers.


The Elvis section came next, again using my Cricut Doll cartridge I cut a pair of boots out in blue and black and layered the blue section on top of the black. I cut musical notes out from my Quarter Note cartridge. The name Elvis was cut from blue card using Mickey Font cartridge with a black shadow, the letters were attached using double sided tape.

I embossed a square of white American craft card using my musical script embossing folder and matted this onto blue card measuring just slightly smaller than a 4" x 4" square.

Using a small micro CD , I fixed this to the embossed square and the remaining cut items were fixed with a combination of double sided tape and glue.


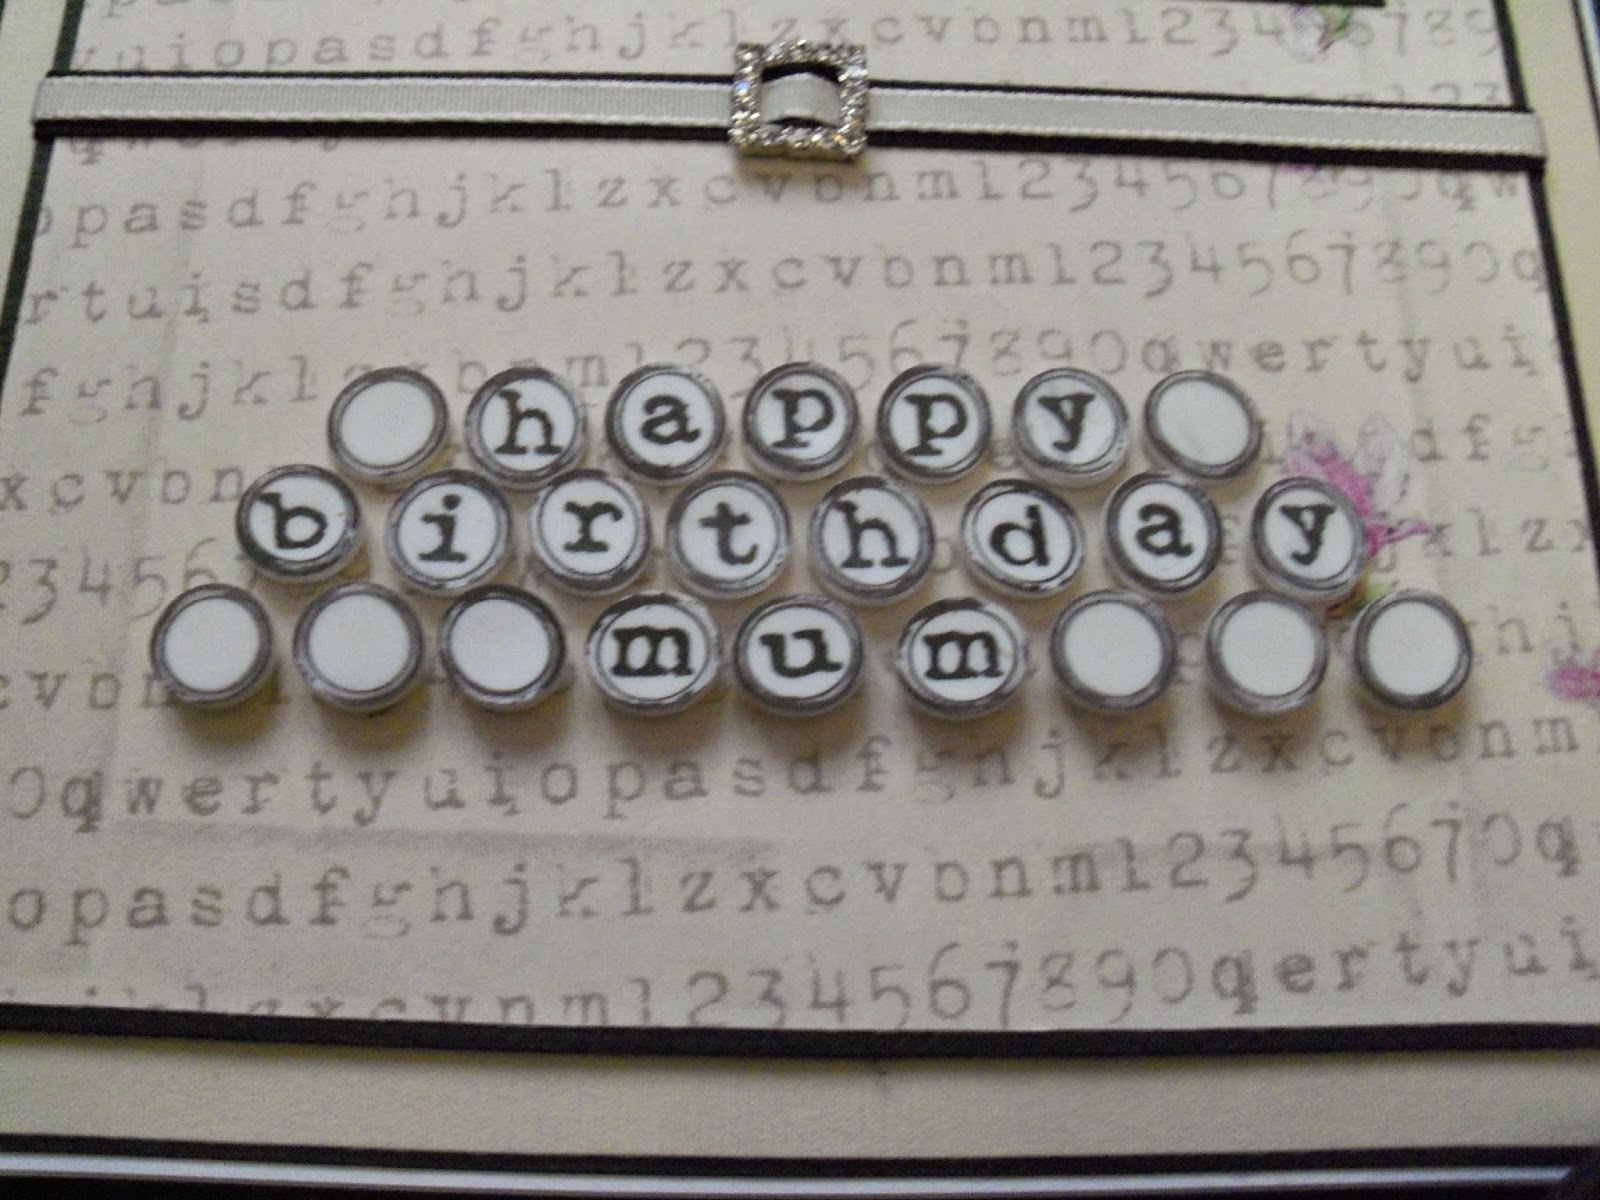
The last square to create was the message square, using a blank piece of white card which had the letters cut out from it using the Cricut Gypsy device, again using Mickey Font cartridge. The letters were cut again from green card stock. Prior to inserting the green letters the white card section was embossed using the Happy birthday embossing folder, the green letters were then inserted in the gaps and fixed using double side tape. This embossed section was matted onto green card stock.


Using an 8" x 8"card, the four sections created were attached using strong double sided tape, due to the weight of the CD section this was attached to the lower section of the card.

An additional message was printed and fixed to the centre of the card to finish. Lets hope Pete has a great birthday, I don't think he will receive another card like this one that's for sure.
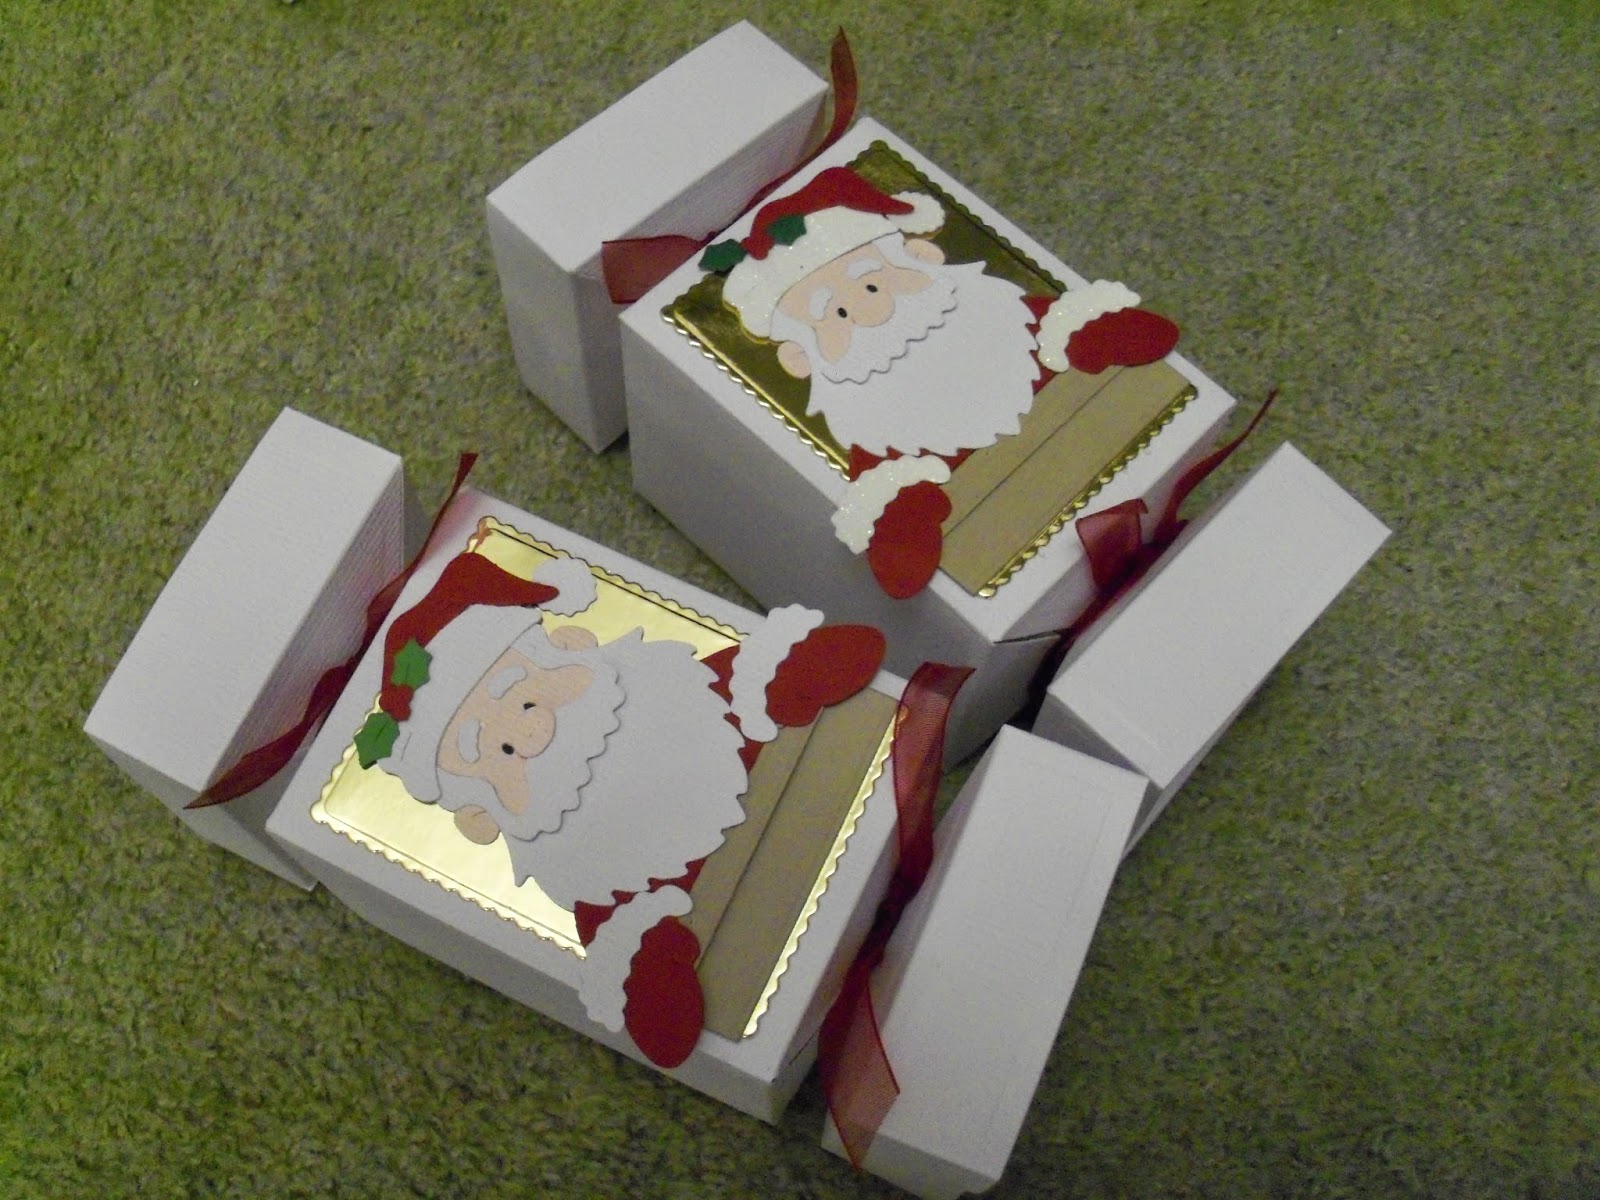
Saturday 1 November 2014

Golfing Dennis reaches the big 70


Commission request for a Golfing themed card, for a special husbands Birthday.

Using the Cricut Paperdolls and Everyday Cartridges, I selected initially the golfing image and clothing. The body was cut at 3.5 inches high. A white marker was used to create the thin layer of hair.

The golf clubs were created using narrow rectangles which were welded together using the Cricut Gypsy device prior to cutting.

 The green back ground was also created using the Cricut Gypsy, using a slanted number '0' from the Mickey Font Cartridge  I created the hole section and the top grass section was welded to the rectangle base shape. Fine grade sand paper was fixed to the base card and the green section fixed over using 1mm 3d foam pads to create a Bunker effect.

The numbers 18 were printed and  fixed to the flag top and fixed to a strip of black card to create a flag pole.

Numerous golf balls were cut and the golf bag was cut from various coloured of card layered and matted up to create detail, two golf balls were fixed poking out the top of the golf bag.

Finally a personalised message was printed and fixed to the centre of the card.

Happy 70th Birthday wishes to Dennis.


 .


Tuesday 7 October 2014

Knitted poppies to raise funds to support the Royal British Legions Poppy Appeal

In August a request was made in our local estate newsletter. The Co-operative Funeral care were calling for knitters to create poppies to raise funds to support the Royal British Legions Poppy Appeal.

They supplied the pattern and the wool, so I started knitting in September, the poppies were fairly quick and easy to knit , it was just the making up that took a while.

I have delivered the completed poppies back to the Funeral care and they hope to start selling them mid October.
 

A Hard Card to Make - With Sympathy

Regretfully I have two dear friend's that have both lost loved ones over the last month. I had never made a sympathy card before and never felt I could, so duly went and bought to cards for my friend's expressing my sorrow for their loss.
 
My dear friend Nicky looked so disappointed when I handed her her card, as she was hoping I had made one, I had to explain I don't make those cards.
 
Regrettable Nicky then suffered the loss of another family member within a month of the previous loss, so I decided this time to try and make a suitable card.
 
I found some lovely floral mice images on the Makey Bakey Mice CD, one of which I thought was a perfect image. I wanted to keep the card fairly plain, so embossed a white piece of Bazzill card stock with a vines embossing folder, this I matted onto a dark pink square card section. I created a further matt of plain white Bazzill card and a further pink matt, this section was fixed to the base card.
 
I matted the main image section on top of dark pink card, this was fixed using 1mm foam pads onto the embossed card section.
 
A personalised message was printed and fixed below the topper section.
 
Finally to finish I die cut to pink trellis sections and cut them down to size to fit down the side panel of the card.
 
I googled 'sympathy verses' on the Internet and was pleasantly surprised at the amount and variety I found, I found some really suitable verses and chose one which the wording fitted perfectly. 
 
I'm glad I made the card as it was gratefully received and hopefully put a smile on Nicky and the family's faces at this hard time. 
 

Happy 50th Birthday to My Sis

Time to make a special card for my sister who is 50th this month. She is an avid sewer so I knew the type of theme for the card.

I selected a topper image from House Mouse Triple CD collection. I printed the topper image out four times as I wanted to create a decoupage image. I also printed an a4 sheet of backing paper out to match the image.

I cut the toppers out creating graduated layering sections, each layer was attached in stages to the base section using 1mm 3d foam pads.  The main section was matted onto green and blue card.

I die cut 3 bobbins from white card and some buttons in two sizes in both blue and green card.

I wrapped blue and green embroidery thread around the bobbins and curved them slightly using a pencil.

The patterned backing paper was cut down and matted onto green card. Thin twine was wrapped around this section and fixed on the reverse. Twine was thread through the cut buttons sections and tied.

A personalised message was printed and matted onto blue and green card, a button embellishment was added to the corner. 

The main image and message section were attached using 1mm 3d foam pads and the bobbin sections attached using silicon glue due to the curved nature.

Finally this was matted onto white and blue card before fixing with double sided tape to the base card.


Belated Baby Wishes Card

This was a card request for a couple who had a baby boy at the end of August - bit late posting I know.

Using Lili of the Valley stamp - Special Delivery, I stamped the image using black ink onto white card stock. The image was coloured in using Promarker pens and then cut and matted onto a blue scalloped card.

Two contrasting backing papers were cut and joined, blue Ric Rak ribbon was fixed across the join. This was matted on to brown and blue card and fixed to the 6" x 6" base card.

A personalised message was printed with the name, date and weight and matted onto brown card. Two little silver charms were attached to two brown scalloped circles using organsa ribbon. Both main image and message topper were fixed to the card using 1mm 3d foam pads.

Sunday 28 September 2014

My first Calendar Box

This weekend I've been making a Calendar box, for a Christmas gift. The pack I purchased from a company Craftwork Cards, the kit comes with 5 white boxes to make up, 12 white card tags per box and 5 mini 2015 calenders.


I took the sections out that were required to complete one box.


I decided to make the box first and took the advise to decorate the box first before making it up. Using a kit of paper and toppers from Craftwork Cards called the 'Potting shed'. I took two sheets of matching papers and some plain Bazzill brown cardstock. I created sections for the front, back and both side sections and matted these onto the brown cardstock. For the front pocket section I wanted to ensure the pattern matched and followed the main front section and matted this onto brown card also.
 
I fixed the front pocket using strong double sided tape and then added all the patterned section to all the sides. I then fixed the box together suing ulta sticky double sided tape as I wanted the box to be strong and secure. 
 
 
All lettering for my box and tags were created using my Cricut Gypsy device and Cartrdge Don Joan , welding and slating alternate letters before cutting. These were all cut from the same brown cardstock.
 
I then started decorating the white tags. I decided to decorate both the front and the back of
each card and I decided that I would not glue the calendar for 2015 to the actual tags (that way it could be reused each year). I parted my calendar and found a mini peg to used to hold this in place. On the  reverse of the tags I wanted to create a pocket to hold a slip of card 2 inches by 4 inches  for personal birthday dates to be noted on - again to be referred to each year. To create some of the pockets I used the toppers supplied in the potting shed pack whilst for others I created a pocket from papers only, all the pockets were stuck down using the ultra sticky double sided tape.
 
The idea of the calender box is that the tag is pulled out of the box and put in the front pocket on the correct month, using the peg supplied to attach the calender.


I continued decorating the remaining 11 tags, ensuring that each month differed and I used a mixture of the papers from the pad, on both the front and the back.

I printed the months of the year onto some plain white card for personalised dates to be written on and these along with the individual calender sheet were placed in the pockets created. 
 
 
It wasn't a quick thing to make but I was very pleased with the end result, have two more planned, a  dressmaking theme and a Disney theme.


Thursday 25 September 2014

A card for Ken - Happy 50th

A card request this time from my husband for a colleague at work Ken who is celebrating a big birthday.
 
My husband was quite specific with his request, Ken is a Wolves supporter but since moving to the Watford area also supports Watford FC.
 
Two football characters were created using the Cricut Everyday dolls cartridge , dressing the figures in the current football kits for both Watford and Wolves. Being Kens 50th birthday the score had to be 5 - 0. My husband being an avid Watford FC fan, didn't take much discussion which team would be allocated the 5 and which the 0.
 
The football badges were printed both small to add to the shirts and slightly larger to create two rosettes.
 
Green card was matted on to both orange and black card stock, four footballs were die cut, and cut and fixed to each corner. A personalised message was printed and fixed to the base of the card.
 
The figures, numbers and rosettes were all fixed using double sided tape to finish.
 
Lets hope Ken has a fantastic 50th Birthday.


Tuesday 23 September 2014

A sweet card for a sweet lady

A special card was needed this month for a special friend, who runs a sweet business.

I decided on a using a decoupage image from my Makey Bakey Mice CD. I selected a sweet image and backing paper to match. I cut all the individual pieces out and layered them up using 1mm foam pads and silicon glue.

I embossed a square section of white Bazzill card stock using a Happy Birthday embossing folder. I added a stamped Happy Birthday image from the Stampin Up range and punched this out and matted onto black and orange card to create a shadow, this was fixed to the embossed card section.

The main backing paper was matted onto black and orange card and fixed to the base card. Black photo corners were cut and attached to each corner to add detail .

The main decoupage sections was also matted onto the same coloured card. The two matted topper sections were attached to the base card.

 
The liquorice sweet embellishments were created in card. The circle sweets were made by rolling up card in yellow and black card. The square variety were created by cutting small squares which were then glued together to create the depth. All the sweets created were attached using silicon glue. An alternative would be to use real sweets but I was concerned about any oil that may mark the card, hence why I created my own card versions.

I hope Karen has a sweet Birthday and likes her card. 

Friday 12 September 2014

Birthday Wishes to Kira


A special card request from a young girl who celebrates her birthday at the beginning of the school year. The request was to have the school name on the card and a girl in school uniform.

Firstly I checked the uniform colour and style for the little girl and then looked on my Cricut cartridges for a school image.

Using the Cricut Gypsy device I selected the school image and added the name of the school in the roof section of the building. The building was cut out of green, white and brown card. The white words were added into the green roof section and fixed using double sided tape to the brown cut piece. The windows were cut from the white section and glued to the brown piece also to add more detail. Part of the building (the steps) were cut again from a darker brown card to create the step section (using the hide option on the Gypsy device to reduce the cut pieces).

The grass sections were cut using the Sizzix Decorative strip die.

The little girl was cut using the Cricut Every Day Doll cartridge. The face was stamped using Sizzix face stamps. The face was stamped again onto white card and the eye sections cut out and glued to the cut face shape.

A personalised message was printed and matted onto green card

All the pieces were fixed to a white square card matted onto a 6" x 6" base card.

Monday 8 September 2014

A card needed this time for a family friend who celebrates her birthday this month - the BIG 40.

This design was taken from Tumble Tizzy CD - from the decoupage section.

The page was printed direct form the CD, I didn't particularly like the scalloped background that was on the printout so I decided to cut the base section away from the background. All other parts were cut out and layered up using 1mm 3d foam pads.

I matted the decoupage bear and glass onto cream cardstock and then on a burgundy red card and black card stock.

The base section was again using cream card and red striped cardstock (from Stampin Up range), a black ribbon was attached across the join with a diamonte buckle. The back section was matted onto red and black card and fixed to the base card.

Black triangles were cut and fixed to all corner sections.

A personalised message for Tracy was printed and matted onto red and black card and fixed to the lower striped section of the card.

To help compensate the weight of the front of the card, once glass section of the bear was retained and matted onto a cream circle which was mattered onto a red and black scalloped circle, this was added to the back of the card using double sided tape.
 

Lets hope Tracy had a fab 40th birthday and enjoyed celebrating.


Monday 25 August 2014

Wedding Congratulations to Linda and Darren

Another card request of my double sided Wedding card design for a special couple getting married in August. The colour theme being mint and navy blue.

 
The base of the card was created using an Original Sizzix die - Car front. I cut 2 car shapes and then 4 circles using a circle punch approximately 1.5" diameter.  I cut the bumpers of the car in silver and the two front headlights, for the rear lights I cut the small circles out of red and orange card.

The Bride and Groom were cut out using Cricut Paper doll Dress Up Cartridge, the dolls were cut out at 3.5" height, I created back views also for the reverse of the card.

Blue card was attached to the base card and an embossed cream card was matted on top. The bridge and grooms( front and back ) were fixed to the card and the car was fixed using double sided tape and 3d foam on the roof part.

Personalised number plate was fixed to the front of the card and the standard number plate message was added to the back view.

Sunday 10 August 2014

Vets Birthday Card

 
Another missed blog post.
 
A card request for a special birthday for a lady who works at a vets.
 
Using the Cricut Paper doll and Everyday doll cartridges, I created the vet figure using the nurse sections and doctors accessories.
 
The animals were taken from the Animal Kingdom Cartridge. Each animal base shape was cut four times and then in different colours to add more detail to the animals.
 
The animals were fixed down the sides of the card to create a border effect and the main doll fixed to the middle of the card.
 
A personalised message was cut and matted onto green card and added to the base of the card.