Search This Blog

Sunday 31 July 2016

Haven't update my blog for a while so here goes a brief catch up of what I've been up to over the last 6 months - the detail maybe brief until I get to recent cards created.

Extra special card for my eldest son Adam to celebrate his birthday - no guesses to which team he supports

Card created using my new Brother scan n cut machine for the Main WFC logo/badge and the boots and happy birthday wording using the Cricut soccer and Mickey font cartridges. The football is a dies Ive used so many times from Quickkutz (one of the first metal dies I purchased). 

#


Saturday 30 July 2016

Haven't update my blog for a while so here goes a brief catch up of what I've been up to over the last 6 months - the detail maybe brief until I get to recent cards created.


Wedding car card request - my most popular card requested  using sizzix original car dies and the cricut paperdolls cartridges for the bride and groom.
.


Wednesday 20 July 2016

A Farewell Gift For Kevin


Time to make a retirement gift for one of our Directors at work - he is like the Dad of the company , his door is always open , there for help and advice whether its work related or not - to say he will be missed is an understatement. I've worked with him for near 12 years and I have to say he is one of the nicest bosses I've had - he will be a great loss to the company.

I wanted to make a folded book creation with the company name on so that it can go on his book case and he can look at it every day and not forgot all those he has left behind still working, whilst he goes off on holidays and enjoying life - do I sound jealous - YES.

The folded wording part was relatively easy following an alphabet chart and creating each letter - the hardest part of this is finding a book with the right number of pages.
The part I enjoy the most is decorating the outer cover. I wanted to incorporate the Company logo on the back cover , so using my Brother Scan n Cut machine, I imported the Compnany logo image and after a slight tidy up of edges in Brother Scan N Cut Canvas on line software , was ready to cut from both white and dark blue card stock. I then fixed the blue wording and house shape into the white section, this was then matted and layered onto blue card stock. 
The spine wording was cut on my other electric cutting machine, using the welding feature to connect all the letters.  Photo corners were cut and attached to all eight corners and a shaped section was attached to the top and bottom of the spine. 
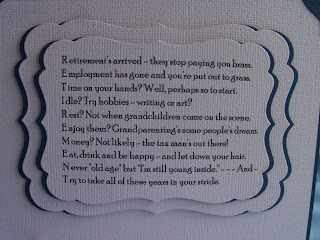
 The front cover of the book I wanted to create a retirement acoustic , I found this nice one on the Internet which I thought was perfect. This was printed and cut on my hand cutting machine and matted onto a blue section, this was repeated again on a large cut shape, both were attached to the front of the card using a combination of both double sided tape and 1mm 3d foam pad.
A section of decorative ribbon (a measuring tape) was fixed to the lower section of the book and fixed across both the front and the back covers using strong double sided tape. The main sections created, font spine and back cover were then all fixed to the book using double side tape.

Finally I decided to raid our bits and bobs draw for screws and bolts to add as embellishments. Blue organza ribbon was tied around the bolts. To fix the screws , a small circle was cut from blue card, white organza ribbon was threaded through and tied around the card and the screw. All embellishments where fixed using a hot glue gun. 


Happy Retirement Kevin - don't forget us ..........

Sunday 17 July 2016

Coffee themed thank you to a Teacher

What to do when your son comes home on a Friday to say he is loosing his existing form tutor that he has had for 2 and a bit years. I had to make her something to say goodbye from my son , although she isn't  leaving the school , she has been absolutely great as a form tutor to my son and has always been approachable to me in and out of school.

Well I only had a weekend to come up with an idea - no pressure. 

I decide to create something on a coffee theme - teachers are always drinking coffee - right.

I created the card using my new electronic die cutting machine , the image I already had I just had to add her surname and cut from green and white card stock.  The green cut section was matted and layered onto a white circle and the black cut die image was attached to the middle.
Using my old Cricut electronic die cutting machine I cut the words thank you out of green and white card stock. The white letters where inserted into the green section and fixed to the top and bottom of a white square piece of card which was matted onto a 6" x 6 " card. 

The named coffee image was attached using 1mm 3d foam pad and fixed to one side of the card.

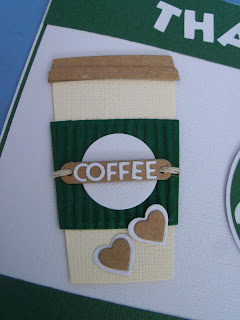
The coffee cup was cut using Die namics coffee cup die , each section was cut out of various coloured card and layered up accordingly the finished image was also attached using 1mm 3d foam pads.


To accompany the card I created, I decorated a white mug with the same coffee image using Vinyl - I'm still leaning using vinyl this was cut again on my newer machine the Brother Scan n Cut - I attached the green section first and then fixed the black cut section.  Could have been a bit straighter but this was my second attempt .


Good luck to Miss S in the future,  hope she ends up with another nice form group to look after.