Search This Blog

Sunday 25 May 2014

A Card for Amy

A card for Amy, who celebrated her birthday this week.

For this card I took an image from the The Lili of The Valley art pad - Pretty Girls.

I took the image and cut into a decorative rectangle using the Spellbinder label dies. A further shape was cut using  a burgundy paper from the Lili of the Valley Always and forever - solids paper pads.  both were mat and layered up.

 Four decorative photo corners were cut from the same paper to add to each corner.

The background card was a white piece of Bazzill card stock, embossed using and embossing folder Florabunda from Crafters Companion.
 
A burgundy strip was cut from the paper background and attached on the embossed card, an organza ribbon was attached over the top.
 
A bow was cut using the Lili of The valley papers using a Spellbinder die

 A birthday message was matted onto a burgundy paper to finish 


A Card for Mary

Another belated Birthday blog, this time for Mary, my son's godmothers who celebrated her birthday this week.

For this card I took an image from the The Lili of The Valley art pad - Pretty Girls.

I took the image and cut into a circle using the Spellbinder circle dies. A cream scalloped circle was cut from the scalloped set of dies.

Four decorative photo corners were cut in cream card to add to each corner.

The background papers were again taken form a Lili of the Valley Paper pads - Always and forever and Always and forever -solids. These were matted onto cream card stock and fixed to the base card.
.
A ribbon section was added using cream ribbon and card and a diamante buckle using an intricate die from Memory Box Tessatina Border.

A circular birthday message was matted onto a cream scallop circle to finish.

A Card for Joyce

I'm a bit behind on my blog posts this month.
 
Mid month was Joyce's birthday (my husbands godmothers birthday).
 
I chose a flower image this year using a Lili of the Valley stamp Daffodils. 
 
The image was stamped using Momento black ink onto smooth white card stock. The image was coloured in using Promarker pens.
 
The image was out cut using a Spellbinder die and cut again in green and yellow card stock and matted and layered up.
 
The two background papers were from Stampin up papers from the Designer series and a green ribbon attached at the join. This background section was matted onto green card stock and fixed to the base card. Four decorative corners were cut and attached using double side tape.
A message was printed and fixed to the base of the card.
 
Belated Birthday wishes to Joyce.
 

Wedding Wishes to Claire & Kevin

 
A card commission request this time for another Wedding this weekend, this time Congratulations to Claire and Kevin.
 
 The colour theme of this wedding was Coral and Mint green.
 

 The base of the car was created using an Original Sizzix die - Car front, I cut 2 car shapes and then 4 circles using a circle punch Approx 1.5" diameter.  I cut the bumpers of the car in silver and the two front headlights, for the rear lights I cut the small circles out of red and orange card.

The Bride and Groom were cut out using Cricut Paperdoll Dress Up Cartridge, the dolls were cut out at 3.5" height, I created back views also for the reverse of the card.
Coral and mint green card was attached to the base card and a cream embossed card stock was matted on top. The bridge and grooms( front and back ) were fixed to the card and the car was fixed using double sided tape and 3d foam on the roof part.

Personalised number plate was fixed to the front of the card and the standard number plate message was added to the back view.


Wedding Wishes to Kate & Richard

I decided to use an idea I've used on a previous occasions. a wedding card with a difference.  After some investigations the colour theme of the wedding was blue.
 

The base of the car was created using an Original Sizzix die - Car front, I cut 2 car shapes and then 4 circles using a circle punch Approx 1.5" diameter.  I cut the bumpers of the car in silver and the two front headlights, for the rear lights I cut the small circles out of red and orange card.

The Bride and Groom were cut out using Cricut Paperdoll Dress Up Cartridge, the dolls were cut out at 3.5" height, I created back views also for the reverse of the card.

Blue card was attached to the base card and an embossed lighter blue card stock was matted on top. The bridge and grooms( front and back ) were fixed to the card and the car was fixed using double sided tape and 3d foam on the roof part.

Personalised number plate was fixed to the front of the card and the standard number plate message was added to the the back view.
 
Congratulatons to Kate and Richard on their Wedding Day.

Cycling Steve turns 50

A card request this month for a Steve who celebrates his 50th birthday. A Cricut character card was requested.

Using the Cricut 'Everyday Dolls' cartridge, I created the main figure using the outfits from the skateboard design. The helmet was created on my Cricut Gypsy device by using the side helmet from the cartridge and adding an extended strap to make it front facing.

The cycle was also taken of the cartridge but altered again on the Cricut Gypsy device by changing the angle of the bike. The bike was then cut out of cream, grey, black and silver mirror card, and sections cut and attached to add the detail.

The main background of the card was a green piece of card matted on to black card, the road section was created using grey card cut at an angle, a white strip was cut for the centre of the road section and two narrower stripes added of yellow.

A personalised message was printed and matted onto black card and fixed using 1mm 3d foam pads. 


Tuesday 6 May 2014

A Card for an Aircraft Fanatic

Another card required this month for a special friend, Rik.

Rik has many interests but a main one is his love of Airfix models mainly aircraft's.

Using La Pashe 'The Big One ' CD . I opted to see what was under the transport decoupage section. There was an ideal image of a Spitfire and a Harrier.

The individual layers were cut out and layered up for each plane and attached to some white Bazzill card stock. This was matted onto black card and fixed using double sided tape to the base card. Four decorative corners were cut and attached again using double sided tape.

A personalised message was printed and attached using 1mm 3d foam pads.

Lets hope Rik has a great birthday.

Monday 5 May 2014

Lego Man Birthday card for Mark

Time to make a card for my youngest son Mark. The inspiration for this card came to me after watching the Lego Movie and the character Emmet.
 
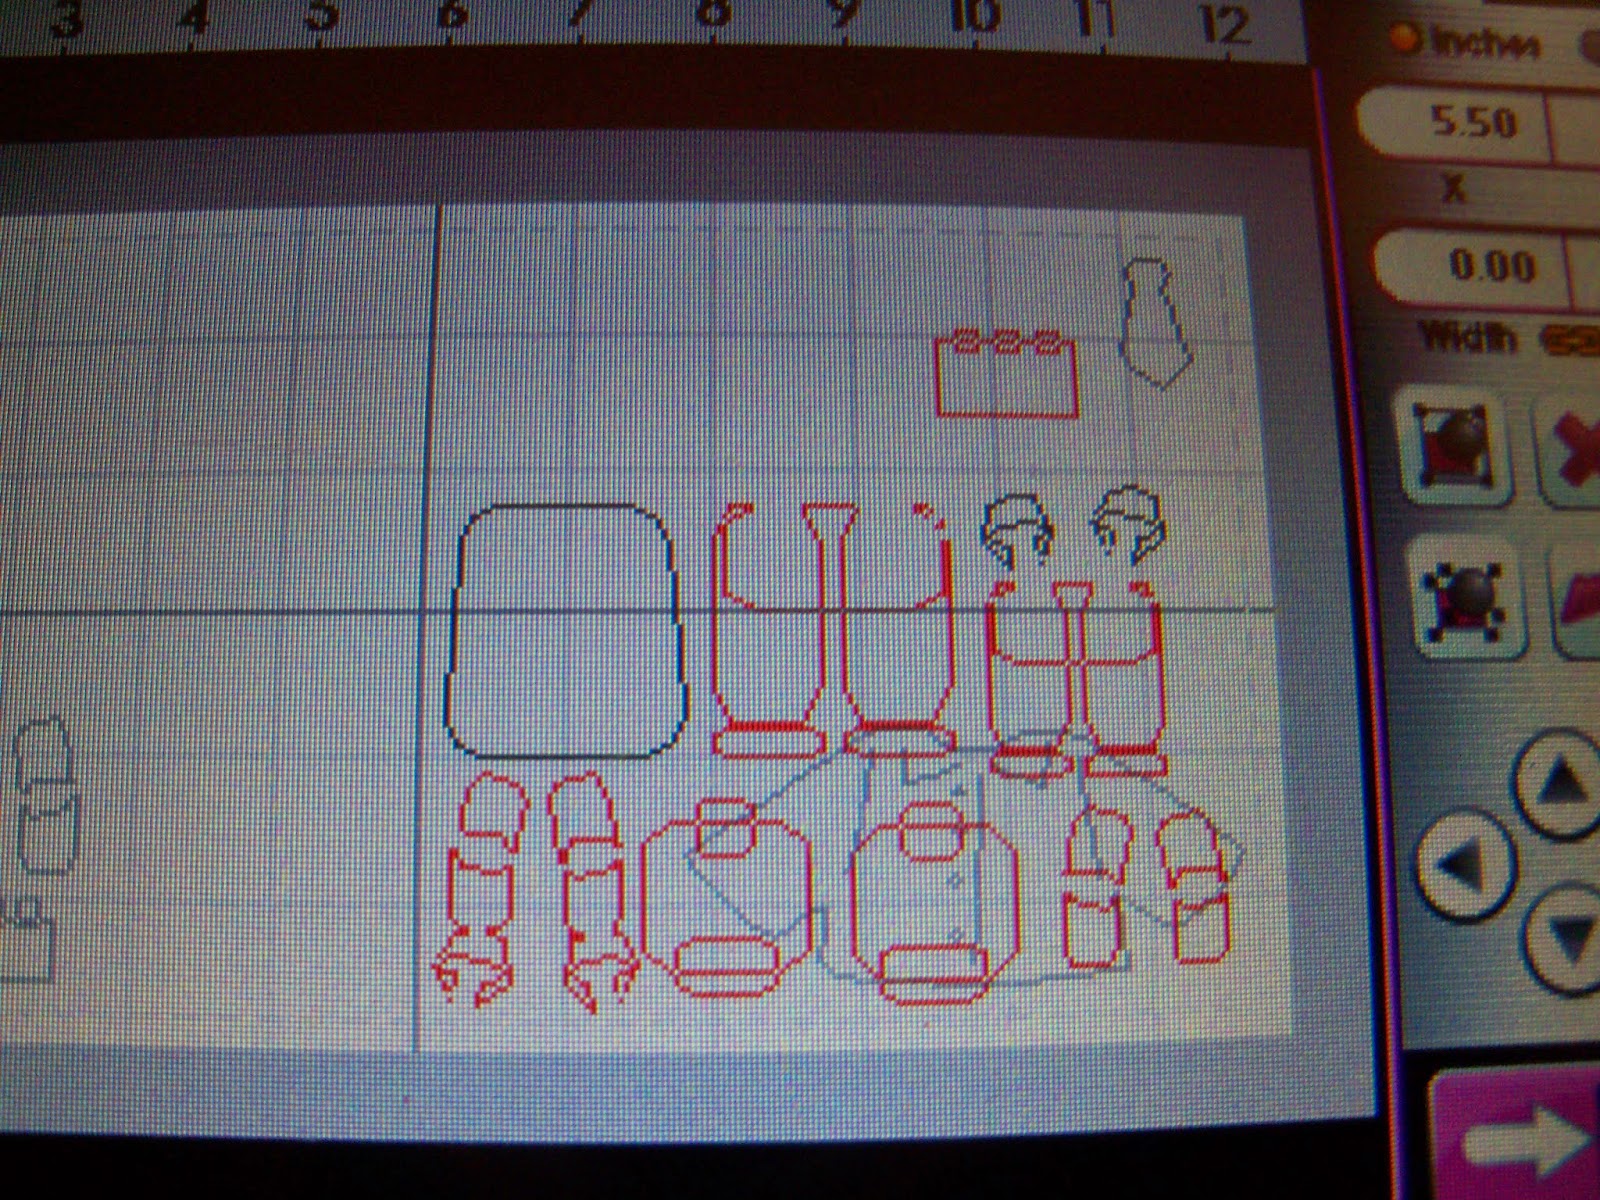
Using my Cricut Gypsy device I started to create a Lego man figure. Using an image from the Cricut Christmas Cheer cartridge - a Christmas bag image, I created the body section. Most other body parts were created using a round square shape again taken from Christmas Cheer cartridge. Each square  were adjusted in height and width independently to create rectangles, these were welded to other rectangles to create arms, legs and head sections . The hands were created from a letter 'c' taken from the Don Juan Cartridge and altered in both height and width.
 
The separate colour bricks were created from a square with sharp corners from the Don Juan cartridge, three reduced to the same size and welded to a rectangle which started as a square but was adjusted in height only.
 
 
The green back ground , I originally tried to emboss a  Lego base board through my die cutting machine, although it went through the machine fine it didn't emboss the Lego wording like I had hoped so I reverted to my original idea of using a hole punch. I punched out numerous circles and added a 1mm 3d foam pads to each.  I positioned each circle about 1cm apart, this was a bit fiddly and I did go a bit wonky at times but the main idea is there.
 
The main Lego character was cut in yellow, blue and white card stock.
 
Twelve Lego bricks were cut out in yellow, red and blue card stock. additional bricks were cut out in the same colours but just the main base brick, without the three smaller squares. the plain rectangles were attached to the shaped bricks using 1mm 3d foam pads to add more dimension.
 
The Lego head was cut out twice on one section the face was created using a Sizzix face stamp , which was stamped in black ink on the yellow section and again onto white paper, the eye sections were cut out and glued over the stamped image.
 
The main Lego man was attached using strong double sided tape and additional 3d foam pads between the circles to secure him in place. A personalised message was printed onto white card and added to the Lego man's body.
 
The bricks created were attached again with double sided tape and 3d foam pads where required. The whole section was them matted onto black card stock and attached to the main base card.