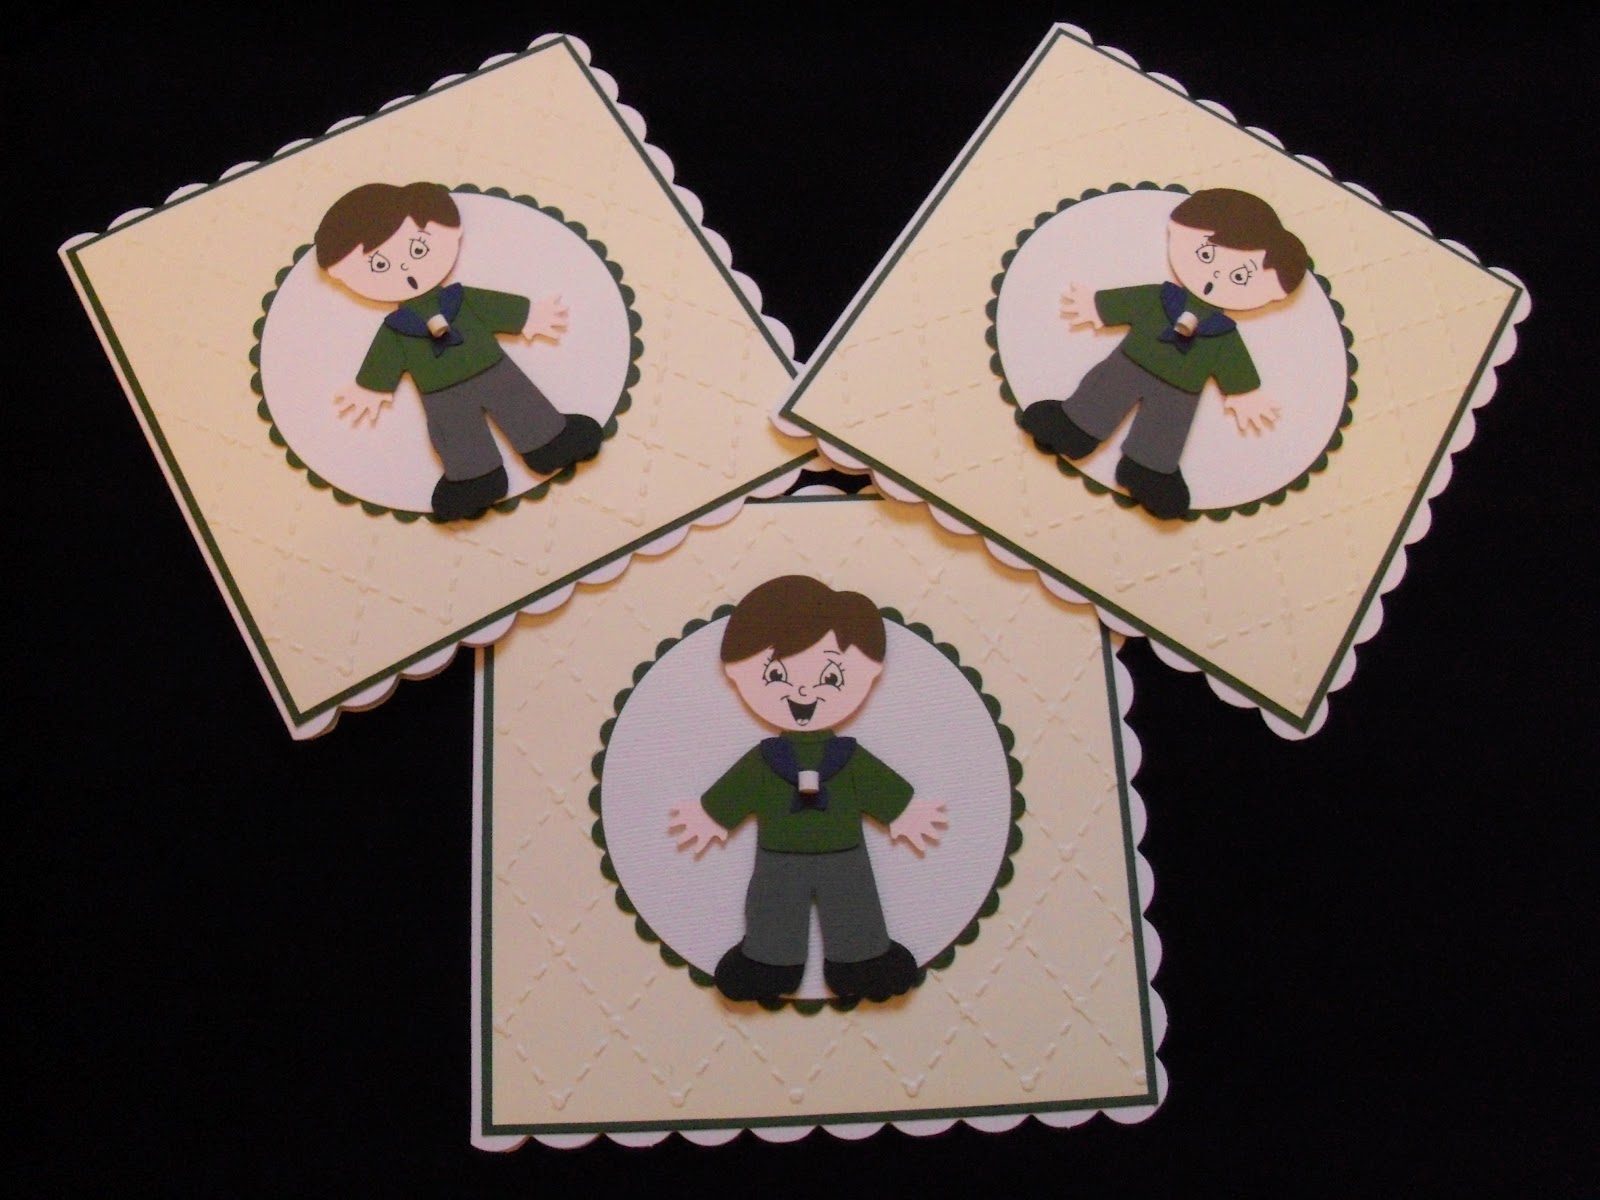
Time for my eldest to move on from his Scout Cub pack. The leaders there do so much work I wanted to do all the leaders a farewell card or gift - there are 8 leaders. The packs grown, originally had 4 leaders so the original 4 had a pillar box wallet with a chocolate bar in and the remaining 4 all got cards.
Using the Cricut machine I used a mixture of Paper Doll Dress Up and Everyday Dolls Cartridges images to create the little cub figures.
Search This Blog
Thursday, 19 July 2012
Farewell Cards to the Teachers
Its been a odd year at my sons schools , both ending with supply teachers.
My eldest is leaving the school in July so wanted to give specific cards to some members of staff and my youngest wanted to give a card to his teaching assistant.
I used a digi stamp from Digi Stamp Boutique - a free stamp download from when they launched their face book page.
I imported the stamp into Serif Craft Artist to add written detail on the books and also erased a small bear which was originally at the base of the books. I personalised each image with appropriate wording depending whom the card was intended for and which of my son's were giving it. I then printed the images out and coloured in using Promarker pens. These were matt and layered onto red card stock and faux stitching drawn around the edge of each coloured image. Messages were printed on the computer and matted to match the main images.
My eldest is leaving the school in July so wanted to give specific cards to some members of staff and my youngest wanted to give a card to his teaching assistant.
I used a digi stamp from Digi Stamp Boutique - a free stamp download from when they launched their face book page.
I imported the stamp into Serif Craft Artist to add written detail on the books and also erased a small bear which was originally at the base of the books. I personalised each image with appropriate wording depending whom the card was intended for and which of my son's were giving it. I then printed the images out and coloured in using Promarker pens. These were matt and layered onto red card stock and faux stitching drawn around the edge of each coloured image. Messages were printed on the computer and matted to match the main images.
Sunday, 15 July 2012
House Mouse Nit Wit Card
Request this week for a 70th Birthday Card on a knitting theme. The image chosen by the sender was a Joanna Sheen House Mouse decoupage design.
I cut the layers out, some being quite intricate in places, and layered them up using 3D 1mm foam. The intricate parts mainly the mice's tails were glued down with PVA glue. The image was mat and layered on to coordinating card stock of orange and blue to match the chair detail.
The sender also requested an easel style card, as the main image was quite large, I created a card size 6" x 6.5" from white card stock. Orange card stock was mounted onto the white base card on two sides.
The sender indicated the wording she would like on the card so this was printed on to white card stock and cut into a strip with a small gap in the middle for an embellishment to be added.
I created a piece of knitting by knitting with embroidery silk (to match the image) on the smallest size needles I had and then transferred the stitches onto a cocktail stick. The ends of the cocktail sticks were snipped with scissors to remove the sharp point and the other end was cut to leave an appropriate sized needle. The ends of the needles were created by wrapping white strips of paper 3mm in width (like quilling) around the ends gluing the whole time til the correct size was formed, when dry these where coloured using Sandstone Promarker to match the colour of the cocktail stick. The needles and knitting where glued to the message strip in the middle using silicon glue.
I cut the layers out, some being quite intricate in places, and layered them up using 3D 1mm foam. The intricate parts mainly the mice's tails were glued down with PVA glue. The image was mat and layered on to coordinating card stock of orange and blue to match the chair detail.
The sender also requested an easel style card, as the main image was quite large, I created a card size 6" x 6.5" from white card stock. Orange card stock was mounted onto the white base card on two sides.
The sender indicated the wording she would like on the card so this was printed on to white card stock and cut into a strip with a small gap in the middle for an embellishment to be added.
I created a piece of knitting by knitting with embroidery silk (to match the image) on the smallest size needles I had and then transferred the stitches onto a cocktail stick. The ends of the cocktail sticks were snipped with scissors to remove the sharp point and the other end was cut to leave an appropriate sized needle. The ends of the needles were created by wrapping white strips of paper 3mm in width (like quilling) around the ends gluing the whole time til the correct size was formed, when dry these where coloured using Sandstone Promarker to match the colour of the cocktail stick. The needles and knitting where glued to the message strip in the middle using silicon glue.
Due to the height of the decoupage and the added embellishment and the size of card created I made a box envelope using the Crafters Companion Envelobox Creator so the card will not be damaged or squashed in a standard flat envelope.
Stop Look & Listen - Birthday Card
Odd card request this week for my neighbour for her future Son in Law.
It seems Ian (the future son in law) has a problem with crossing roads, being that he just walks across them without looking, so this was the main theme of the card. He also liked one of my previous cards with Mr Potato Head, so decided to incorporate Mr P in the card too.
I used my Cricut Machine to cut Mr Potato Head out at 4.5 inches in height. Using my Cricut Gypsy device I created some glasses to put on Mr Potato Head as Ian wears glasses, but made them spell LOOK as the frames, I added acetate to the back of the OO to resemble glass.
It seems Ian (the future son in law) has a problem with crossing roads, being that he just walks across them without looking, so this was the main theme of the card. He also liked one of my previous cards with Mr Potato Head, so decided to incorporate Mr P in the card too.
I used my Cricut Machine to cut Mr Potato Head out at 4.5 inches in height. Using my Cricut Gypsy device I created some glasses to put on Mr Potato Head as Ian wears glasses, but made them spell LOOK as the frames, I added acetate to the back of the OO to resemble glass.
I created the sign posts on the Cricut Gypsy device and cut the background shadow in black card stock. The posts were cut from red card and 2 circles with the letters cut out were cut from white card stock, the letters were cut again from red card and inserted in the white circles.
The pavement was created using two strips of grey card stock and the centre road markings were cut by hand after the phrase was printed on the computer.
The message inside the card was Stop, Look and Listen , or you will end up mashed. Lets hope Ian has a great birthday and can see the funny side of this card - one of my most oddest requests so far.
Wednesday, 11 July 2012
Computer Crafting with my Son Adam
My Son is due to leave Junior school this month and wanted to make a card for his teacher who is unfortunately off sick and won't be returning before the end of term.
He wanted to include a photograph of his class on the card so I suggested he have a go using the new Serif software I've recently obtained.
He asked a teacher at the school to take a photo of the class, which we then imported into Serif Craft Artist. We downloaded the school logo from the school website and imported this onto Serif also as an embellishment.
We selected some digi kits that I already had installed, themed around school and sports. Adam my son then started creating, he thinks the software is brilliant, he liked how quickly he could change backgrounds and add embellishment's and take them off again, he picked it up very quickly how to lay the embellishment's behind each other. He learnt how to change colours of the embellishment's - we had some odd colours at times! He finally decided on a plainer background as he initially selected a sports balls backing paper which made it all look a bit to busy.
We printed it out and matted onto black and red card, he's taken it into school now to get all his classmates to sign it.
Lets hope his teacher likes it and gives him somthing to remember his class and recovers in time for the new Term in September.
He wanted to include a photograph of his class on the card so I suggested he have a go using the new Serif software I've recently obtained.
He asked a teacher at the school to take a photo of the class, which we then imported into Serif Craft Artist. We downloaded the school logo from the school website and imported this onto Serif also as an embellishment.
We selected some digi kits that I already had installed, themed around school and sports. Adam my son then started creating, he thinks the software is brilliant, he liked how quickly he could change backgrounds and add embellishment's and take them off again, he picked it up very quickly how to lay the embellishment's behind each other. He learnt how to change colours of the embellishment's - we had some odd colours at times! He finally decided on a plainer background as he initially selected a sports balls backing paper which made it all look a bit to busy.
We printed it out and matted onto black and red card, he's taken it into school now to get all his classmates to sign it.
Lets hope his teacher likes it and gives him somthing to remember his class and recovers in time for the new Term in September.
Friday, 29 June 2012
Girlie Birthday Card
One of my sons classmates birthday this week, card for an 11 year old girl. Decided to use the New Cricut Paper Doll Teen Scene Cartridge.
I selected the outfit first and then the hair, similar to the young girl in question. She currently likes bright coloured clothes so cut the outfit in bright pink and green.
I cut the image 4 times, in white, black, skin tone and cream card stock. The hair overlay was also cut in cream. The body size was 4.5". I cut leggings and trainers bases in white card, trainer tops , shirt and cap in pink card and the skirt was cut from green cardstock.
The 4 body parts were all layered up, cream at the base, followed by white, then black and skin tone on the top. The cream overlay hair was the last to apply. The trainer parts were glued together. The remaining parts were glued in place to the main body.
I created an embossed white backing section using Cuttlebug Happy Birthday embossing folder.
This and the pattern backing papers were all inked round the edges with green ink and matted onto green card. Faux brads from Craftwork card were added to each corner.
I selected the outfit first and then the hair, similar to the young girl in question. She currently likes bright coloured clothes so cut the outfit in bright pink and green.
I cut the image 4 times, in white, black, skin tone and cream card stock. The hair overlay was also cut in cream. The body size was 4.5". I cut leggings and trainers bases in white card, trainer tops , shirt and cap in pink card and the skirt was cut from green cardstock.
The 4 body parts were all layered up, cream at the base, followed by white, then black and skin tone on the top. The cream overlay hair was the last to apply. The trainer parts were glued together. The remaining parts were glued in place to the main body.
I created an embossed white backing section using Cuttlebug Happy Birthday embossing folder.
This and the pattern backing papers were all inked round the edges with green ink and matted onto green card. Faux brads from Craftwork card were added to each corner.
Isabel is 11......
Request received for an 11 year old birthday for a daughters friend, on a scooter theme , shocking colours but not pink.
Using My Cricut Everyday Dolls Cartridge , I cut the doll out with and additional head using the blackout function.
Using the Cricut Gypsy device I changed the shape of the scooter slightly so that the doll stood on it better, the scooter was cut out 3 times , using black, grey and silver cardstock. The girls shorts, t-shirt and scooter pads were cut out using the same cartridge, the wheels section . The helmet was created on the Gypsy device, using the side view helmet from the cartridge but with additional side parts welded to it to create front view helmet.
The dotted background was created using Cuttlebug Swiss dots embossing folder , matted onto green and purple card.
Using My Cricut Everyday Dolls Cartridge , I cut the doll out with and additional head using the blackout function.
Using the Cricut Gypsy device I changed the shape of the scooter slightly so that the doll stood on it better, the scooter was cut out 3 times , using black, grey and silver cardstock. The girls shorts, t-shirt and scooter pads were cut out using the same cartridge, the wheels section . The helmet was created on the Gypsy device, using the side view helmet from the cartridge but with additional side parts welded to it to create front view helmet.
The dotted background was created using Cuttlebug Swiss dots embossing folder , matted onto green and purple card.
Subscribe to:
Posts (Atom)