Search This Blog

Tuesday 17 August 2021

Paper Beads - Sustainable Craft


Paper Bead Bracelets 

These Paper beads and bracelets are the perfect way to create costume style jewellery to match your outfits or colour theme. They can be sized to fit both children and adults and can be made to suit both male and females. 

The beads and the bracelets can be made by everyone of all ages and are both sustainable, have a daily use, are aesthetically pleasing and are great fun to make !


This is a special blog post for Hobbycraft Artisan application, stage 2


Skill Level - all levels

Cost -  £14 - £19

Time 2 hours 


Materials used are available from Hobbycraft

You will need;

A4 Papers of your choice 

PVA Glue

Mod Podge     


Large safety pin  

Masking tape   

- Scissors       

- Bead Template Pattern - download my free template here

NOTE: Throughout these instructions the small template has been used to create bracelets with 9 small beads.

On the combined template download I have also made available a large template which would create bracelets with 6 large beads.


Lets get started

 You may want to watch my short "how to" video before you begin - click here

Step 1


Select your chosen sheet of paper (I used a sheet from Leopard Mix Designed Paper Pad) and your embroidery threads (I chose DMC Blanc, 927 & 3799).

Step 2


Using the small template size, cut 9 triangle pieces, 1 rectangle and two half triangles, you can use a paper trimmer or scissors to do this. 

Step 3


Using a cocktail stick curl a triangle piece from the widest edge and roll around the cocktail stick applying small amounts of PVA glue as you roll.
Be sure to roll evenly to the pointed end and ensure the piece is fully glued before removing it from the stick - leave to dry, repeat eight more times. 

Roll the rectangle piece and the half triangles in the same way but keep the edges straight on the rectangle and one end straight on the half triangles then leave to dry.


Step 4


Apply Mod Podge to the completed beads to seal the edges and give protection - I used gloss but there are other finishes available including matt and sparkle. Allow to dry.

Step 5

To create the cord I used three colours of embroidery thread, my colours coordinated with my selected paper sheets, you could equally use one colour only to create your cord.


Step 6 

Cut 3 lengths of 80cm, fold these in half and attach to a safety pin, these I taped down with masking tape to hold in place.


Step 7 

Using the folded threads I plaited using the strands all the way to the end, tie a secure knot to the end - we will trim the end piece later.  


Step 8 

Take a 1/2 triangle (stopper) section first and thread onto the plaited cord - you may find this easier using a large eyed needle.  Next thread the rectangle buckle and then thread your oval beads on to the cord


Step 9

Thread the needle back through the buckle (rectangle) bead creating a closed loop 


Step 10

Attach the final stopper bead to the cord and tie a knot in the end, trim the end of both knots to finish


Your bracelet is now complete !


This craft is so enjoyable and easy to create, the different types of bracelets you can create are endless. 

- I've created a few more variations below, some have metal beads added

- You can also use various types of papers, for example I've used a page from an old atlas

- You could use old large books or even used post envelopes where you could design or stain your own paper

- You can also substitute the embroidery threads for leather or cord, or try an alternative plait to create different cord effects

- Finally I've made just one style of bead here, using different template shapes you could create different style of beads, the possibilities are endless - and all from just a piece of paper !

The possibilities are endless with this sustainable craft.

Whatever combinations or materials you choose, enjoy what you do and please share your makes with me via my social media platforms.


Below is an example of a 6 bead bracelet created using the large template


Wednesday 11 December 2019

Hunkydory - 'Do you want to build a snowman' Card

Time to make another card using the lovely die cut set from Hunkydory Moonstone selection - Do you want to build a snowman


This time I decided to use my electric die cutting machines to create a frame section with the cut message 'Happy Christmas';
- I created the white frame using my Cricut Create machine and welded the lettering to a square shape, then used my Brother Scan n Cut machine to create the two mat sections in red and green.

Note: I used the two machines because my Cricut Create only cuts to a maximum size of 5.5 inches and the card I wanted to create was 7 inches square.


I then cut the snowman and his accessories out using my manual die cutting machine, cutting two or three pieces of each item in green, red , white and brown card stock.


I glued the lettering to the frame section and created the main frame with the mats and layers and fixed this to the base card using 1mm foam tape, in order to add dimension.

I then created the main snowman feature of the card and fixed in to the centre of the aperture again using 1mm 3D foam pads.


As I advised on my previous blog post I like to add dimension and detail to my die cut pieces by layering up sections, and on this occasion I've added small white pom poms to the bobble hat. I fixed each of these cut pieces around the white frame section lifting some pieces with 1mm 3D foam pads to create more detail.


I love the final result. What do you think ?

This die set from the Moonstone range is available to purchase on the Hunkydory website - currently priced at £14.99;


Check the attached link to go direct to Hunkydory website, additional link for Hunkydory Moonstone Die sets

https://www.hunkydorycrafts.co.uk/dies-embossing/cutting-dies/moonstone-dies-by-hunkydory.html


Sunday 3 November 2019

Hunkydory Snowman Photo Card

Latest card creation using the die sets from Hunkydory Moonstone collection, 'Do You Want to Build a Snowman?' and 'Snap Happy!'

I received these products from Hunkydory for review but all opinions are my own


When I first obtain a new die I always cut all pieces out in white card/paper only, just to see how to make the best detail out of each cut shape. The camera in particular from these sets, I found is ideal to layer up to create an additional dimension.
Either way I think the dies in these sets are fabulous whether cut as individual items or layered up.


Initially I was going to create a card design from each of the die sets separately but the more I looked at them I decided I could combine both sets to create a really smart Christmas card.


The equipment I used for this card project is;


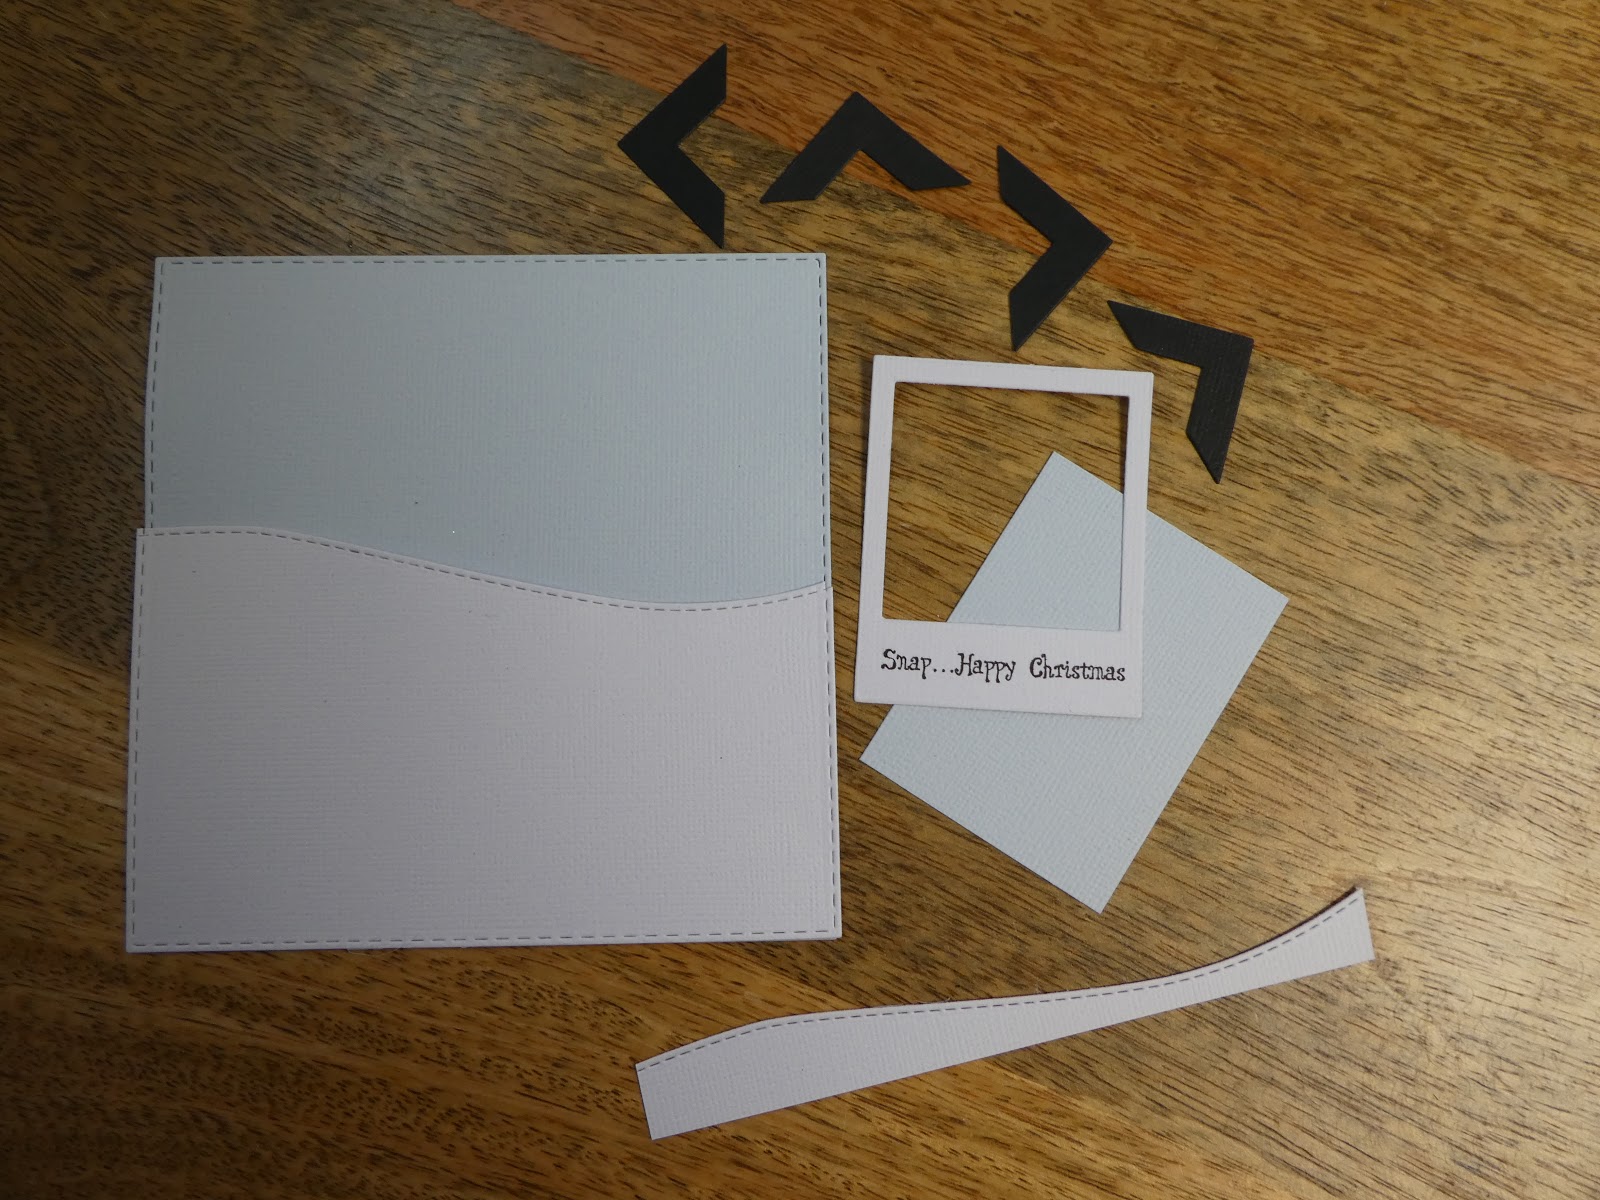
I initially printed on white card the 'Snap... Happy Christmas' phrase and then cut this using the photo frame die from the Snap Happy die set.
I then cut 4 black photo corners to add to the background of the card. I like to do this as it just neatens the corners of the finished card and was an ideal embellishment bearing in mind the camera aspect in this card.
 
A square was cut in light blue card using a Sue Wilson die square shape and a further duplicate piece was cut using white card. This was then in turn cut in half using the Sue Wilson Finishing Touches 'stitched hill' die to create the background base card - this is optional as the background square and matt could easily be cut using a paper trimmer, but I personally like the extra stitched edge detail.

The main camera die I cut twice in black card (to be used for the dimension) and also in grey and white - the white being the base piece.
The grey section was glued directly on the white, and I cut the two black pieces to add detail pieces to the front - this being the lens section, shutter, flash and small buttons.
I cut a small section of silver for the flash detail. I added a small piece of acetate to the lens and shutter section and to finalise overlapped 5 small pieces of black card to create the shutter effect on the lens - as I said, I do love to add detail !


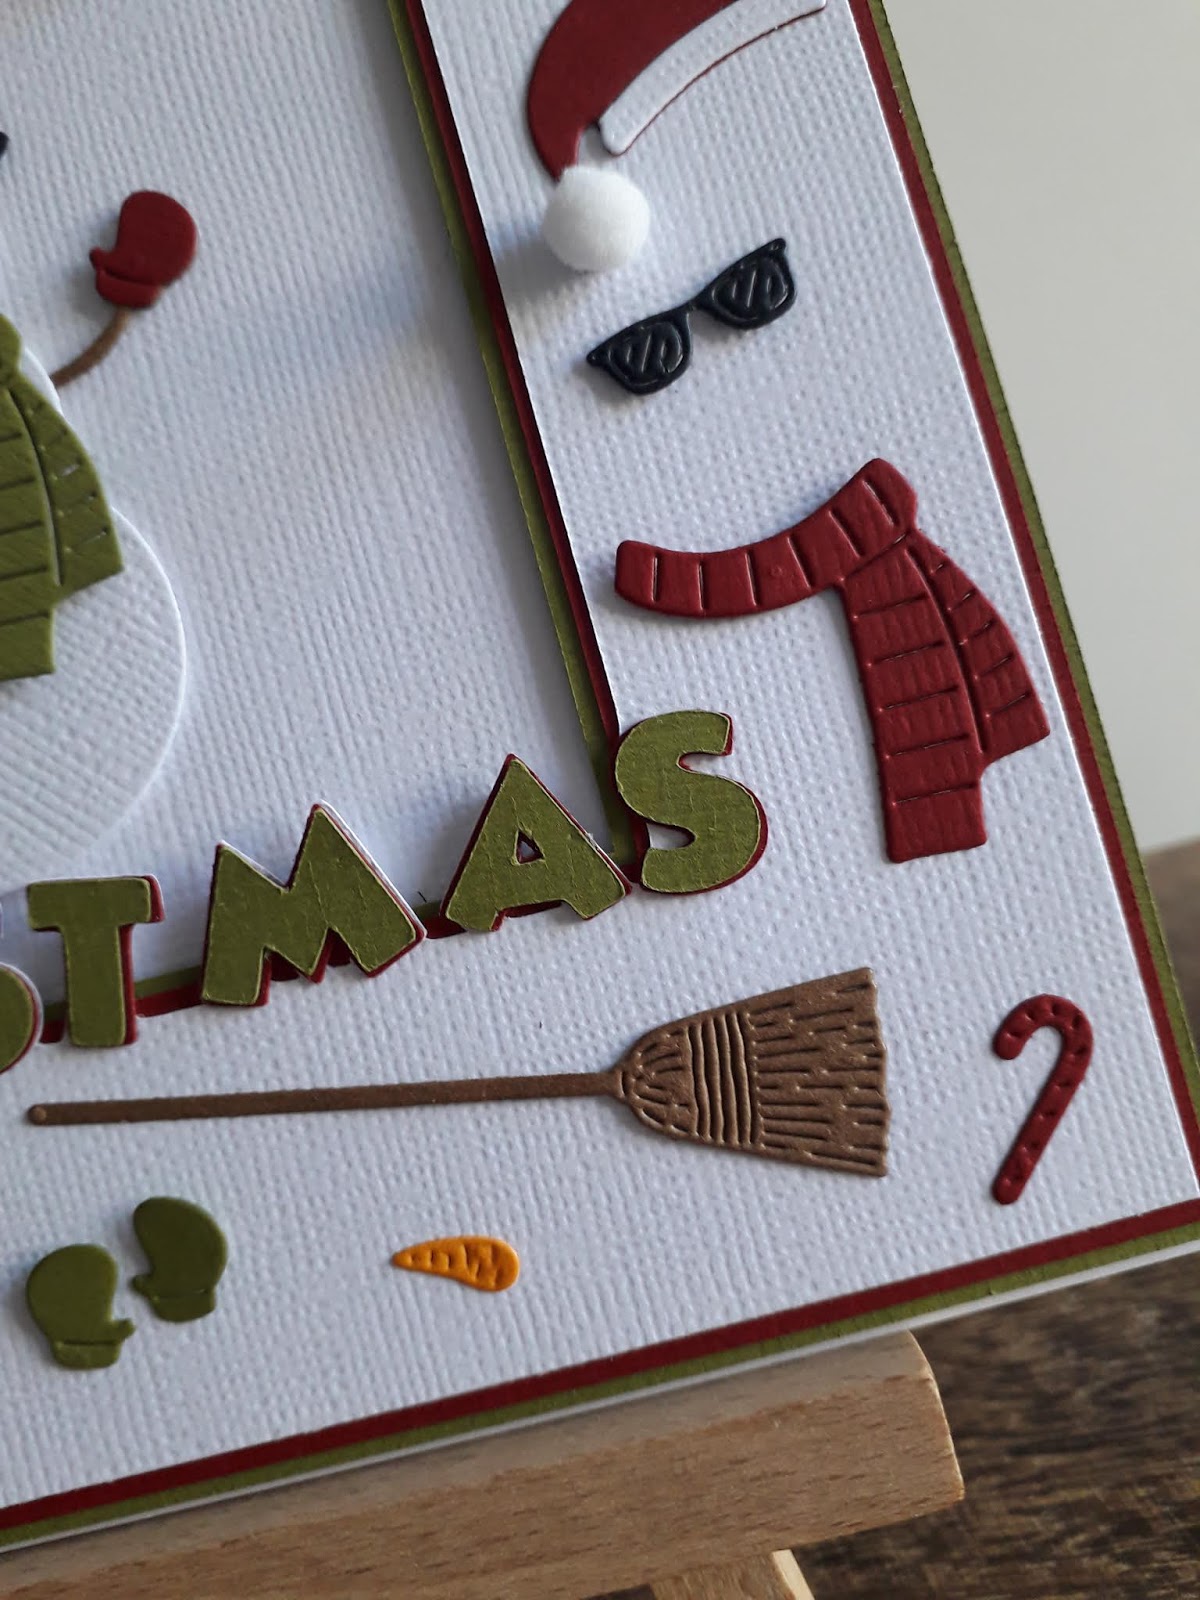
I then concentrated on the build a snowman set, and on this set there are so many options to choose from to create various types of snowman, in fact the options are endless.
For this initial card I selected the top hat and scarf, I cut two of the following , arms (red and brown), top hat (black, red and green),  carrot nose and one scarf. Three additional small circles were cut from white cardstock for the melted snowman.


I created a whole snowman to fit in the photo frame and then created the image of a melted snowman by the left hand corner using the cut circles.


The card was finally put together with the photo frame coming from the base section of the camera, this was applied using 3d foam pads to add further dimension.


This card can be recreated in so many different ways as there are so many options for dressing the snowman contained within the set - even some cool sunglasses !
 
Here's the finished article - 'Snap... Happy Christmas' !


Overall I thoroughly enjoyed making the card with these sets. There are numerous options to make unique and bespoke cards and I'm looking forward to making some more in the future.
 
These dies sets can be used by any paper crafter from beginner upwards - in fact either would be an ideal starter set for someone new to paper crafting.
 
Just one thing to be aware of - I found placing the small black facial detail fiddly to get the desired effect on the snowman. Some patience will be required with that but I think for future creations I will simply place a cut black card behind the whole image.
 
 
These die sets from the Moonstone range are available to purchase on the Hunkydory website - both currently priced at £14.99;


Check the attached link to go direct to Hunkydory website, additional link for Hunkydory Moonstone Die sets
 
https://www.hunkydorycrafts.co.uk/dies-embossing/cutting-dies/moonstone-dies-by-hunkydory.html


Thursday 29 August 2019

Special Birthday wishes to Mrs C today , enjoy your celebrations 🎈🍰🥂 #cricut #cricutuk #diecutting #birthday #handcrafted #balloons


Sunday 25 August 2019

Happy 21st birthday wishes - love creating these characters , makes a truly personalised card 😊 #cricut #cricutuk #diecutting #birthday #hobbycraft #birthday #birthdaygirl